Here are two methods of determining when you need to change the cartridges in your inkjet printer:
- The automatic route: Most inkjet printers on the market today have on-screen alerts that appear when the ink level of the cartridge is low. Or, like you see in Figure 1, your printer might be able to display the amount of ink remaining in a cartridge (a very valuable trick, indeed, especially for students with term papers looming in the near future).
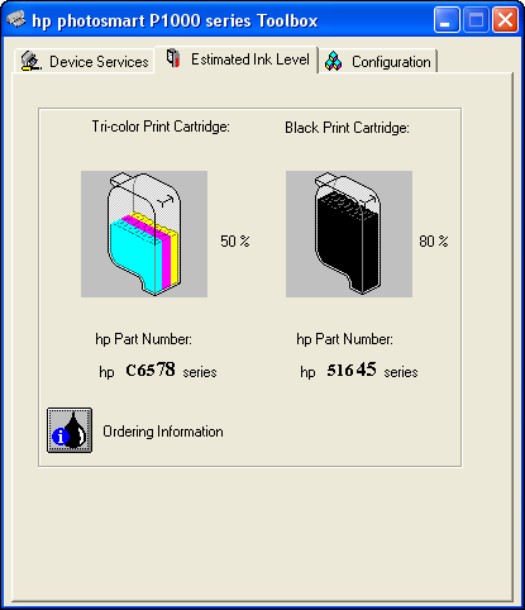
Figure 1: Checking the ink levels on late-model inkjet printers is a cinch.
- The "Man, I can barely read this page!" method: If you have an older inkjet printer, you might not receive any warning about the ink levels in your cartridges — but when they're empty, pardner, you'll know.
After you know that you need to change your cartridges, however, the general procedure is the same for virtually every inkjet printer:
1. Open the top of your printer.
This will cause most printer models to politely center the carriage to provide you with access to the cartridges.
2. After you have access to the cartridges, turn your printer off.
 | Never try to change the cartridges in a printer that's still powered on! |
3. Lift or turn the latches holding the ink cartridge in place.
Most inkjet printers have at least two cartridges — one for black and one for color — so make sure that you're working with the right cartridge before you remove it.
4. Remove the used cartridge and consider refilling it.
5. Load the new cartridge and fasten the latch to hold it down.
6. Turn your printer back on and close the lid.
No comments:
Post a Comment